Building a Home Recording Studio Desk:
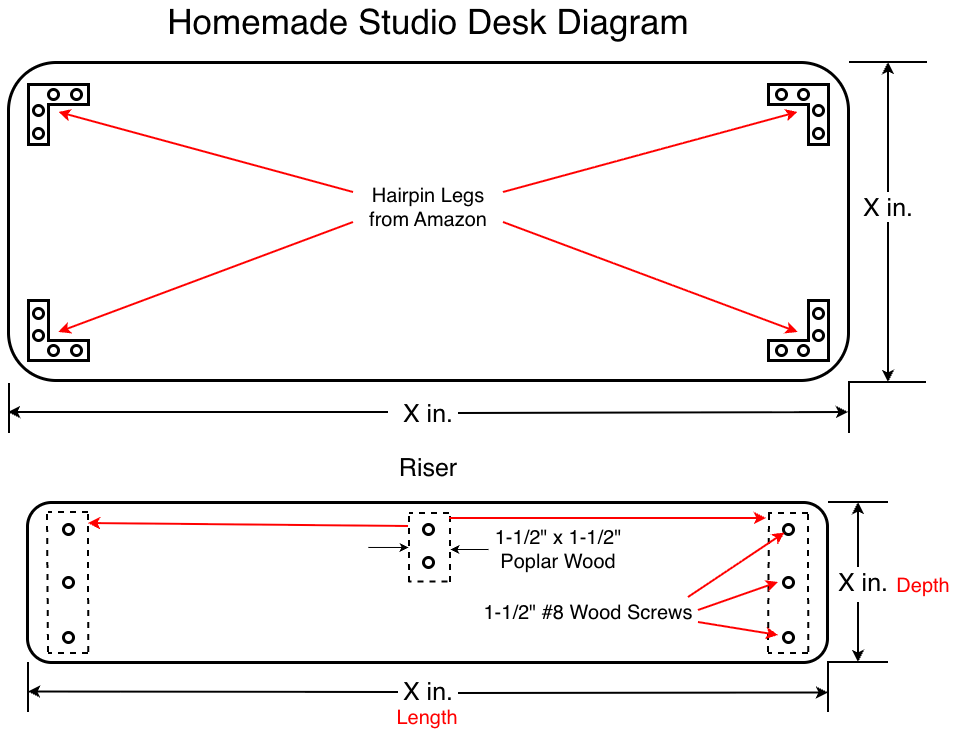
Have you ever looked for a decent recording studio desk? I have designed and built a simple desk for your recording needs. You can build my own desk and riser to the exact space without paying for a expensive desk. If you have a decent size space, then see below if these drawings for you. See below of build of materials.
You’ve got this!
Tools & Materials of building your homemade studio desk for your bedroom.
Tools:
Drill
Phillips Head Screwdriver
File - to round the top, bottom and corner edges of the wood
Sandpaper to smooth out edges to avoid splinters after fully assemble
Use 1/16” or 1/8” Drill Bit for Pilot Holes
Wood Countersink Drill Bit/Set - #6, #8 - 9/64”, or #10
Build Material for Homemade Studio Desk:
2’ Depth x 4’ Length x 3/4”- Thick
Qty. 16-18 Screws: #8-X inches” Wood Screws
Riser:
Oak Wood – Length should be a ¼: shorter on each side of desk (left & right side) and half the depth of the desk, also the board should be wide enough for your display monitors & speaker monitors need room to fully sit on the Riser without hanging over the edge of the board.
Qty. 16-18 Screws: #8-1 ½” Wood Screws
1 ½” x 1 ½” Poplar Wood for riser. 28 –36” Length for Left, Center & Right side
Wood Glue
Wood Clamps (Instead of buying some, ONLY borrow your friend’s clamps)
CAUTION:
Always wear safety glasses and ear whenever you’re using a power!
Wear ear protection when using power tools because it can gradually diminish your hearing over time.
NOTE:
When drilling a pilot hole from 1”to 1-1/4” deep. Slowly drilling in (forward) and out (reverse) a little bit at a time to remove wood chips from the hole.
NOTE:
Drill bit does get really hot after drilling. Avoid touching the drill bit after drilling.
NOTE:
Round the top, bottom and corner edges using a wood file, and use sandpaper to smooth the edges to avoid wood splinters in your hand or fingers.